Molds produce spores that float in the air and can cause allergic reactions in people. These spores can also trigger respiratory problems like coughing and shortness of breath.
Vinegar is a natural and odorless way to kill mold spores on non-porous surfaces. It is a great alternative to bleach for killing surface mold. It can be used in combination with hydrogen peroxide or baking soda for enhanced effectiveness. Go to Mold Removal Salt Lake City for more details.
Preventive Measures
Keeping mold and mildew from developing in the first place is a key preventive measure that will preserve the value of a home while safeguarding its occupants’ health. By addressing the common causes of mold growth, such as moisture and humidity, water leaks and poor ventilation, homeowners can significantly reduce their risk of exposure to these harmful fungi.
Mold spores are airborne and can travel throughout a building, contaminating surfaces, furnishings, and other items with which they come into contact. Exposure to these spores can also lead to a range of health issues, particularly for infants, children, and individuals with certain medical conditions, such as respiratory disorders. In addition, mold spores can trigger allergic reactions in individuals with sensitivities to these substances.
The best way to avoid exposure to mold and mildew is to regularly clean and dry household fabrics, such as carpets and upholstery. Keep these materials away from damp environments, such as basements and crawl spaces, and take them outside when possible to air out. This helps to eliminate the spores and prevent them from spreading to other areas of the house.
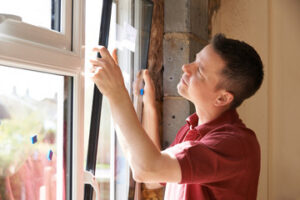
It’s important to address any moisture problems promptly, as even small amounts of water can encourage the development of mold and mildew. This can be accomplished by repairing water leaks, preventing condensation in colder areas of the house such as attics and basements, and by ensuring adequate ventilation in bathrooms.
Other precautions include minimizing the amount of stored items in attics, crawl spaces, and garages, as these can promote moisture accumulation. Depressurizing these areas with fan-powered exhaust may also be beneficial for limiting the transport of microbial contaminants by lowering their airborne concentrations.
Finally, regular cleaning and decluttering can also help to limit the presence of mold and mildew. Bathrooms, in particular, are vulnerable to moisture and spore buildup due to daily activities such as bathing and showering. Make sure that towels are spread out and air can circulate in the space; minimize the number of containers left in the shower; and use a dehumidifier in humid months to reduce excess moisture.
Cleaning
Molds are fungus that, in the right conditions, can cause damage to buildings and people. They release spores that can cause allergic reactions and, in some cases, mycotoxins which can be harmful to health. Therefore it is important to clean up any visible mould as soon as possible and to fix the moisture problem that caused it.
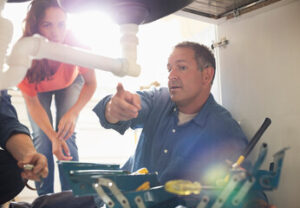
There are a number of different methods for cleaning up mold, but it is important to remember that the most effective way to stop mold growth in the first place is to control moisture. This means fixing leaks, repairing water-damaged building materials and cleaning up and drying any damp or wet areas as soon as they occur.
It is also advisable to use a dehumidifier and fans in any affected rooms to remove excess moisture and prevent the formation of mold. It is also important to wear personal protective equipment (gloves, eye protection and a mask) during the cleaning process.
A bleach solution is often the most effective method for cleaning mold from painted walls. However, the use of chlorine bleach should always be accompanied by good ventilation to avoid inhaling fumes.
Alternatives to bleach include vinegar, borax and hydrogen peroxide. These alternatives work in a similar manner to bleach, but they do not produce toxic fumes. They should be sprayed directly onto the affected area of the wall, left to sit for 30 minutes or so and then scrubbed with a brush before being rinsed with clean water.
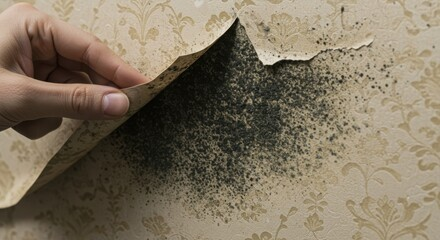
Cleaning up a visible area of mold is relatively easy. However, investigating hidden mould problems may be more difficult. For example, the removal of wallpaper can result in the release of mold spores from the underside of the paper, which may be difficult to find and contain.
If the mould is extensive, it may be necessary to consult a professional. The specialist will examine the affected area and take samples for testing. This will help to determine the type of mould and the extent of any damage. It will then be possible to develop a suitable remediation plan.
Containment
Molds produce spores that travel through the air, often hitching rides on clothing or pets. Once in a new area, they can grow on damp surfaces or absorb nutrients from rotting organic matter. When they come into contact with human beings, mold spores can trigger allergy-like symptoms such as a runny nose, watery eyes and difficulty breathing. Some molds can even produce harmful mycotoxins that may cause serious illness or death.
During a cleanup, it is critical that contaminated areas be contained in order to limit the spread of mold spores and protect building occupants. Containment involves the construction of barriers that can be accessed only by authorized personnel who are wearing personal protective equipment (PPE). The barrier can be created using plastic sheeting or other impermeable materials.
The type and level of containment required is based on the size of the contaminated area and the risk that mold spores will distribute to other parts of the building during cleanup. Generally, heavier growth in a smaller area requires more extensive containment than lighter growth in a larger area. However, professional judgment should always be used to determine the appropriate level of containment for each situation.
Before remediation begins, decide on the entrance/exit point to the containment area. If possible, place the entrance/exit close to a path out of the building to avoid hauling moldy debris farther than necessary. Tape polyurethane sheeting to the floor, walls and ceiling at the entrance/exit to the containment zone. Then, install a HEPA filtered negative air machine in the containment zone and turn it on. The negative air machine will pull in clean, filtered air through flexible tubing and expel it through the same tubing out of the containment zone. If the negative air machine is working properly, the plastic sheeting should billow inward. If it flutters outward, it is not working and should be corrected before remediation begins.
It is also important that any contaminated items be removed from the area and placed in sealed trash bags. Items that cannot be moved must be wiped down or scrubbed with a non-toxic cleanser, then rinsed and allowed to dry completely. Porous items, such as drywall, insulation, wallpaper, carpet and furniture must be discarded.
Restoration
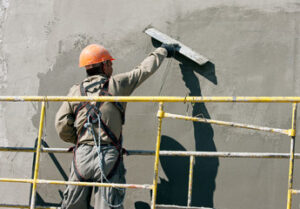
The restoration process may involve a wide range of tasks, depending on the scope and depth of the mold infestation. It may include repairs, reconstruction or replacement of materials damaged by mold, such as drywall, carpeting and flooring. It also includes disinfection and odor removal. This is usually the most time-consuming part of the process, as the contaminated materials must be removed and cleaned, and spores in the air need to be eliminated.
The type of mold that grows in a house can affect the health of the inhabitants, especially those who are sensitive to it. It can lead to a variety of health problems, including allergies, sinusitis and asthma. Long-term exposure to toxic mold can even be fatal. If you have any respiratory issues or are allergic to mold, it is important to get the problem checked out by a professional.
Mold spores can be spread from room to room through ventilation systems, so it is essential that containment is in place. The first step is to remove all porous materials that have been wet and cannot be cleaned, such as carpeting and padding, paper and wallpaper, and insulation material. Non-porous materials, such as metal, hard plastic and concrete, can be cleaned. Any items contaminated with sewage should be bagged and discarded, as they are likely to remain a source of mold growth.
Baking soda can be used to clean surfaces affected by mold, and it is a safe alternative to bleach. A quarter of a teaspoon is mixed with water in a spray bottle and then sprayed onto the affected surface. The surface should then be scrubbed with a brush or sponge and then rinsed clean with water. It is important to ensure that the area is completely dry before attempting to use it again, and fans or open windows can be used to facilitate the drying process.
If you suspect that you have a serious mold problem, it is important to hire a mold remediation expert. They will be able to test and identify the specific species of mold in your home and recommend a remediation plan. If you are concerned about the health effects of toxic mold, it is also a good idea to have an independent third-party inspector assess your property. They can provide a report of their findings, and if needed, they can also conduct laboratory tests to confirm the presence of toxic mold.